The ALU shall be designed with Mentor's HDL Designer software package called FPGA Advantage. FPGA Advantage has been installed on a NFS mount and requires environment variables to be set in order to properly run. These variables consist of binary pathes and licensing location. To make life easier, I have created a script that will set the proper values upon network login.
Our first step is to identify our shell. This can be done by
executing the following command and observing the output:
echo $SHELL
If your shell is "/bin/bash", you will want to add the following
line to your "~/.profile" file. This file executes commands
upon your login. You may use the program "pico" within
a terminal to edit the file or any text editing program you are
comfortable with.
source /usr/local/3rdparty/cad_setup_files/mentor.bash
If your shell is "/bin/csh", you will want to add the following
line to your "~/.login" file. This file executes commands
upon your login.
source /usr/local/3rdparty/cad_setup_files/mentor.csh
These changes will not take affect until log out of your
session and log back in. In order to save yourself some time,
you may run the command that you typed into your
.profile or .login file. This only needs to be
for this session. Every subsequent logins will load
the login script.
Our next step is to create a work directory. This directory's purpose will be to store ".do" files that run our testing criteria in the later tutorials. This helps in organization and the ability to run the ".do" without typing their absolute pathes. You may name the directory anything you'd like, but this tutorial's sake, it will be named "mentor_work". The following command will create the director:
mkdir mentor_work
With the program variables loaded into your environment, you can execute the program from any directory. But, in order to take advantage of executing our ".do" files without typing out their complete path locations, we will run the program in our newly created "mentor_work" directory.
cd mentor_work
fa_with_ps &
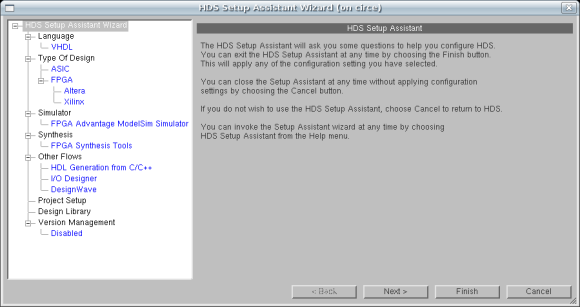
If everything is setup correctly, you'll see the following
window the first time you open FPGA Advantage.
Click "Cancel" to exit the HDS Setup Assistant.
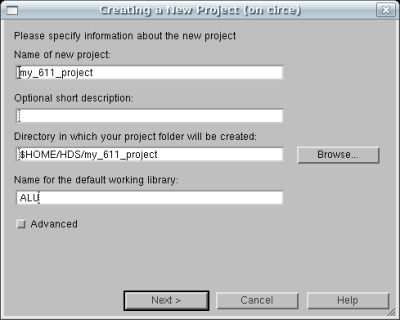
Your project name will be "my_611_project". You can enter a
short description if you wish. The default directory in which
the project folder is created is ok. If you
wish to alter the path for organizational purposes, please
make sure it is be located somewhere inside your
PERSONAL DIRECTORY, for example: "/acct/s1/username/".
Upon selection of your file storage location, enter the name
of the default working library which will be ALU.
Click Next.
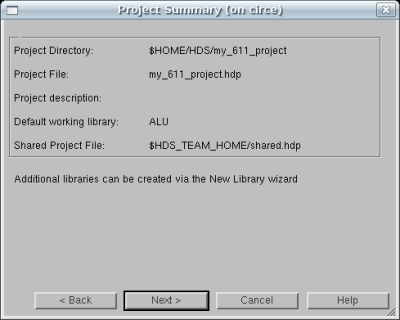
Click Next once more.
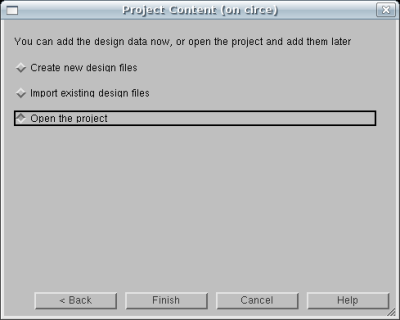
Click "Open the Project" and then click Finish.
This window is the Design Manager. The Design Manager is your tool for creating and managing libraries. A library is simply a collection of designs, or components, which may be used within other designs (in other libraries).
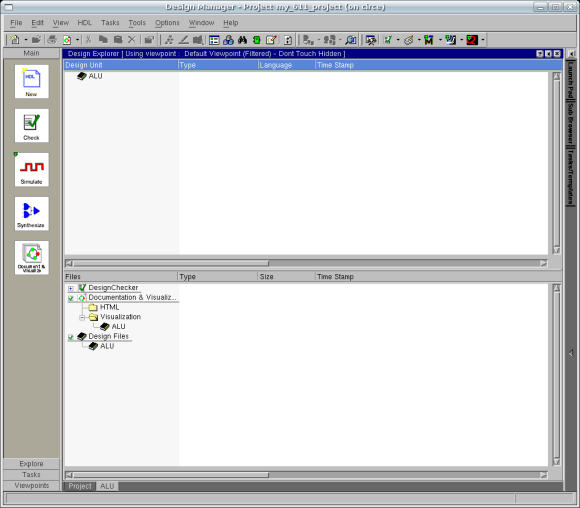
Click the project tab to see your library mappings.
In creating our project, we have already created a new library called ALU.
This is the library in which we'll be designing the ALU. After you complete the
design of the ALU, you will use a component from this library in the design of
your MIPS processor. We need to create another library, CSELib,
which will contain pre-made designs that you will use in the design of your
ALU. When we create a new library in the Design Manager, we're actually only
creating the path mappings to the design data. Design Manager has already
created the ALU library for us, so we just need to create the CSELib library.
Let's get started.
Go to File | New | Library. From this dialog box, choose "Protected"
and click Next.
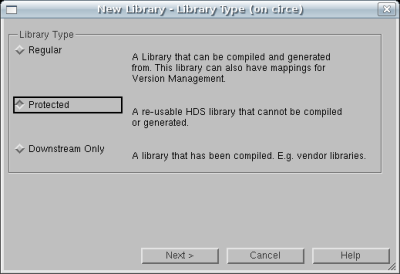
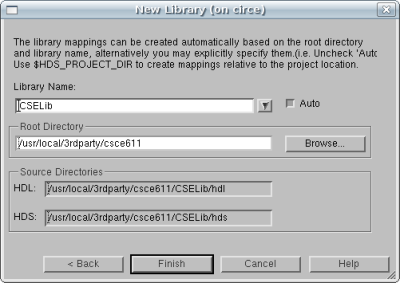
The library name is "CSELib" and the root directory for this library
is /usr/local/3rdparty/csce611 . Click Finish.
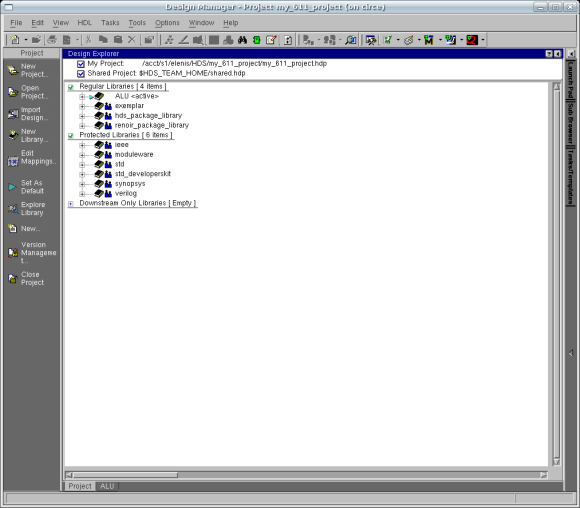
You now have two libraries. The ALU library is the library where you will be
storing your designs for this tutorial. The CSELib library
is the library where we have provided you several components that you will need
later on. Use the tabs at the bottom of the Design Manager to switch between the
Project View and the Library View. Go to the Project View by clicking on "Project".
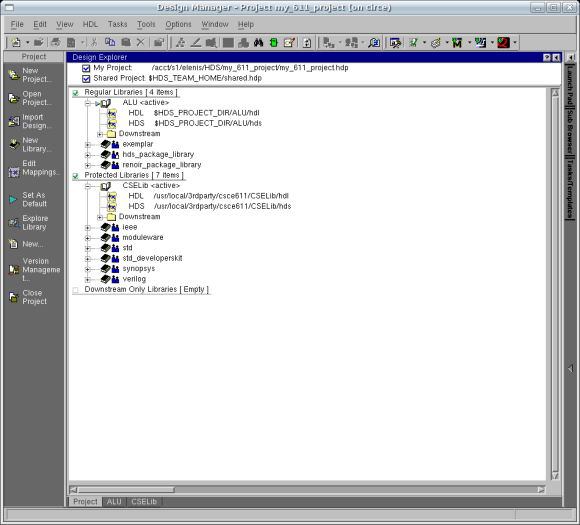
Here is where you'll see the new libraries you've added,
plus several others that are there by default. If you
double-click the CSELib library, a new or existing "Design
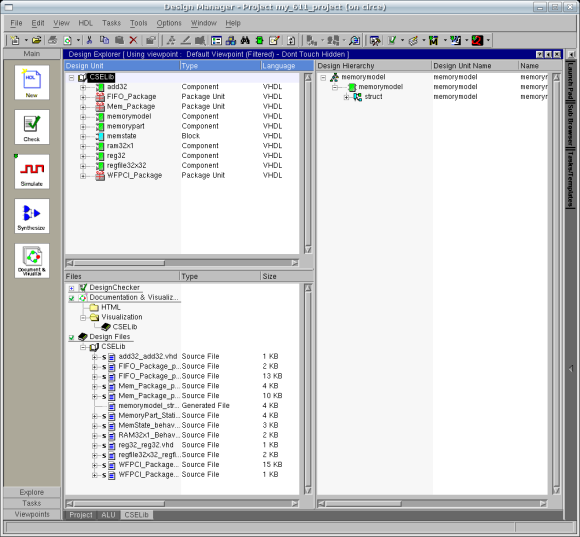
Explorer" tab will open that will allow you to look at
the contents of the CSELib library.
Do not worry that there are red x's over the components.
This means that they are read-only.
Now let's start building our ALU...